
Contact Center
Scheduling in eRAD RIS
Existing Patient - Scheduling Ordered Exam - Single Exam
When scheduling a patient, it is always best practice to search for the patient in the system first. This will help to identify whether the patient is existing or new and can provide the details of the patient’s history.
- Review the patient history before scheduling exam

- Highlight the ordered exam

- Right click on ordered exam and select "Schedule"
NOTE: "Schedule" may also be selected for bottom-right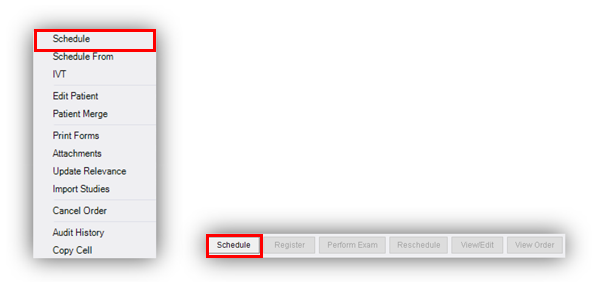
- "Schedule Order" window will populate
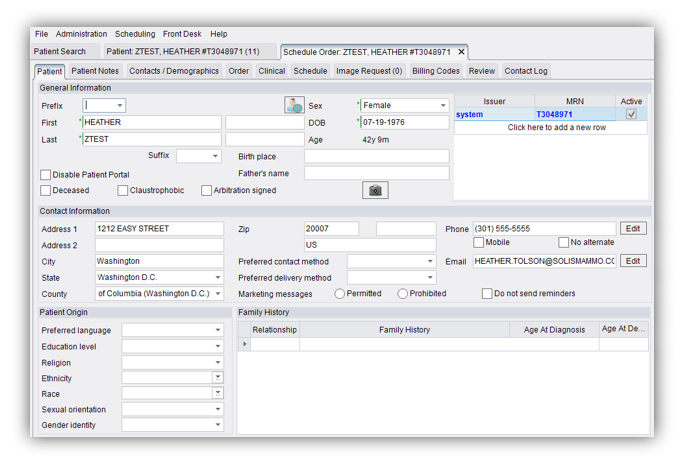
- Click on the "Schedule" tab

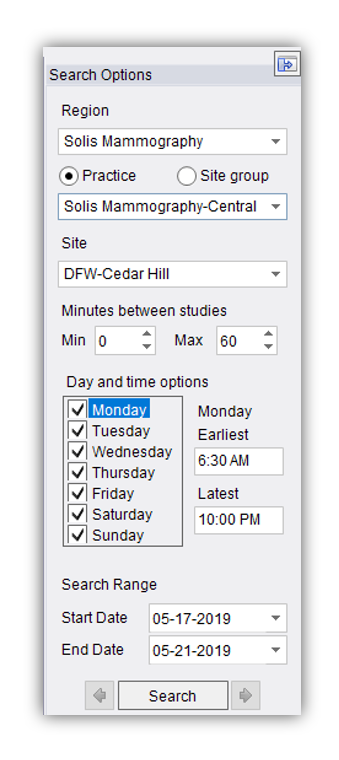
- Use Search Options to make selections based on patient preferences
- Region - Solis Mammograhy
- Practice - Time Zone
- Site - Location
- Minutes between studies - Defaults to Min: 0 and Max: 60
- Day and time options - Per patient request
- Search Range - Dates that will be searched
- Search
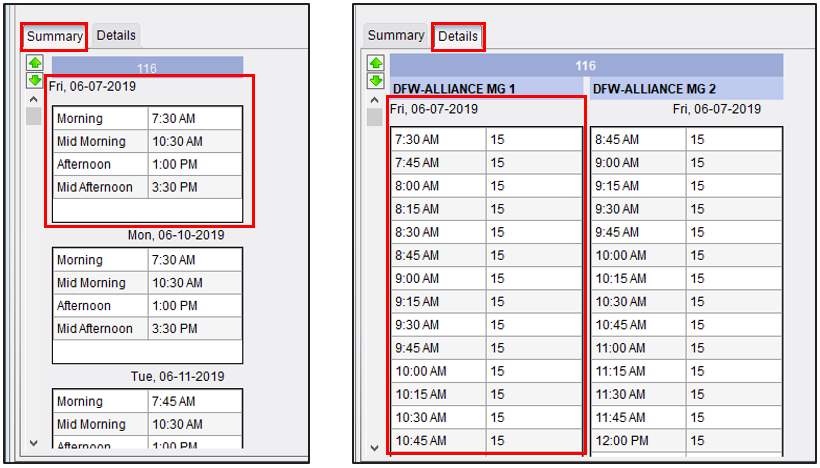
- Select date/time
- On the “Order Tab”, add the order detailed information.
- Reason for Order - If already listed, DO NOT UPDATED! If this field is blank, select from the Auto-text options listed. Then copy and paste into Order Notes.
- Referring Physician Details – Search for the referring physician by name [last name, first name] and click the magnifying glass. Confirm the appropriate physician by stating the address in the Primary Office field. CC Physician- If requesting to add additional physicians, add into this section.
- Class – This is for the Contact Center to update if prior films are required or not.
- Urgency Level – This represents the call and/or order status for the exam (Priority Status)
- Manage Policies – This is where patient insurance information (Carrier and Policy #) will be captured
- Order Notes – This is for the Contact Center only! Add any notes that were collected on the call from the patient at the time of scheduling
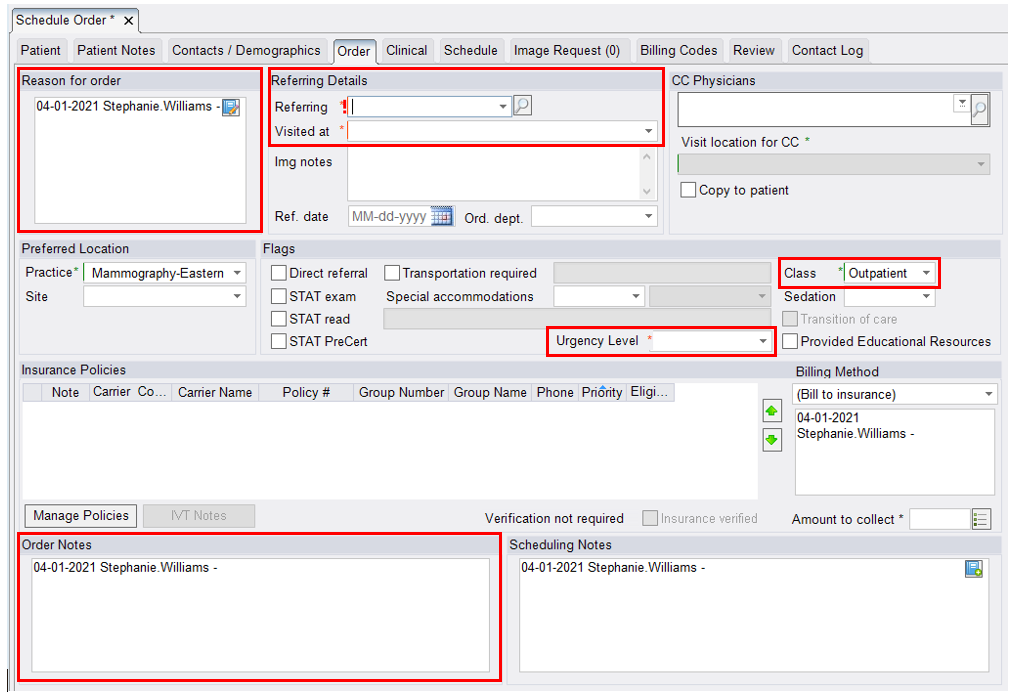
- Once all appointment information has been entered, click "Schedule" at the bottom right of the screen.

- If any information is missing, a red exclamation will appear at the right bottom side of the page with the appointment errors. All errors must be correct before scheduling. If there is an error, the bottom right side of the screen will display the error.

- "Schedule Summary" will populate with the patient's appointment confirmation details and prep instructions.
- Recite the exam(s), date(s)/time(s) and Center address to the patient
- Provide the prep instructions for all exams scheduled
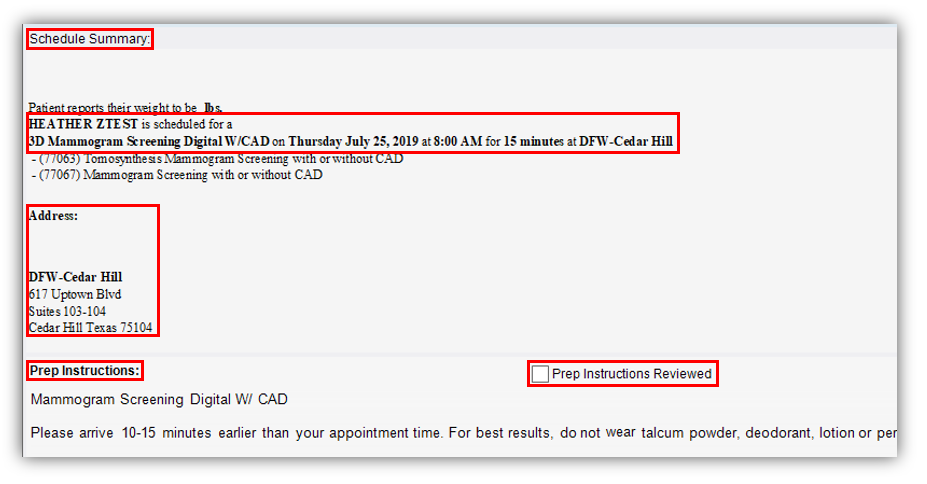
- Once the prep instructions have been provided to the patient, check the "Prep instructions reviewed" box

- Select "Schedule" - AT THIS POINT EXAM HAS BEEN SCHEDULED

EDITED: 04/02/2021


