![]()
Creating a New Patient in eRAD
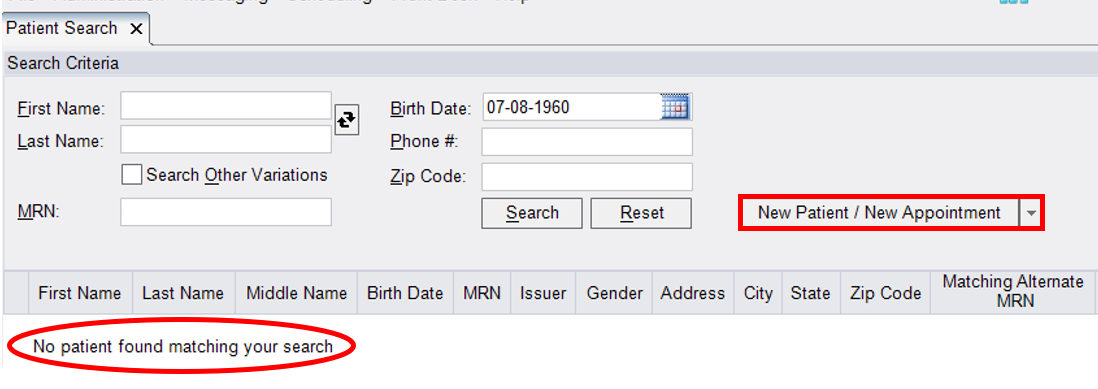
When creating a new patient profile in eRAD, it is important to exhaust ALL search options to assure the patient doesn't have an existing profile in our system. Be sure to search by any combination of the following criteria: First Name, Last Name, DOB, Phone #, MRN, Confirmation # or Accession #, BEFORE creating a new file.
- Once ALL search options have been exhausted, and the patient is still unable to be located in the system, click the "New Patient/New Appointment button
 IMPORTANT: Information entered will only be saved if scheduling is completed!!!
 - The Schedule Order window will populate with the Patient tab displaying
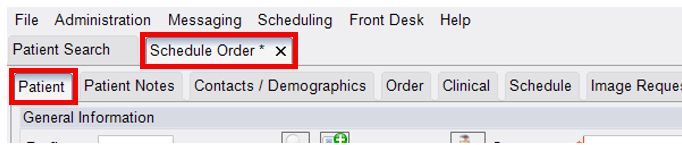
- Collect patient information to add to file
NOTE: Enter information in all caps, use patients legal name as it appears on their drivers license or state ID- First Name
- Last Name
- Sex/Gender
- DOB
- Address - City, state and county can be bypassed since entering zip will populate those fields

- Phone - Ability to specify a mobile number or primary number if the patient would like multiple contact numbers listed
- Email

- NOTE: It is best practice to verbally read back all information captured for accuracy
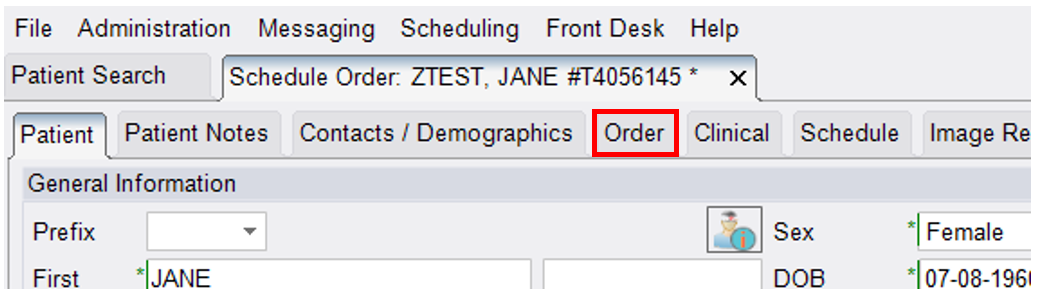
- Once all demographic information has been captured, click on the Order tab
- Complete the following fields
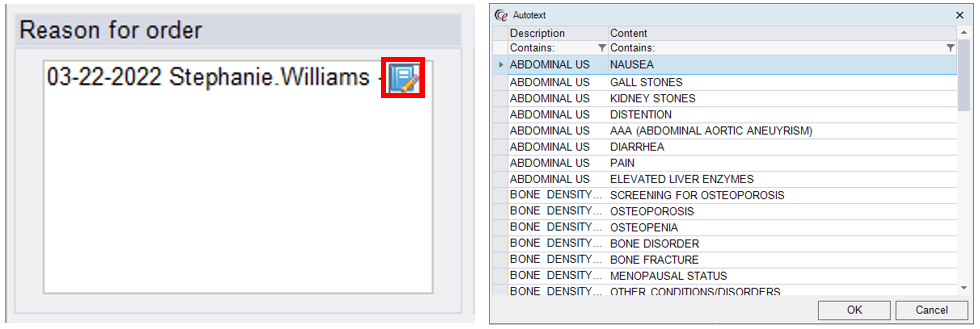
- Reason for Order - select from dropdown or free type into field if reason provided is not on list. Copy and paste the Reason for Order into the Order Notes field
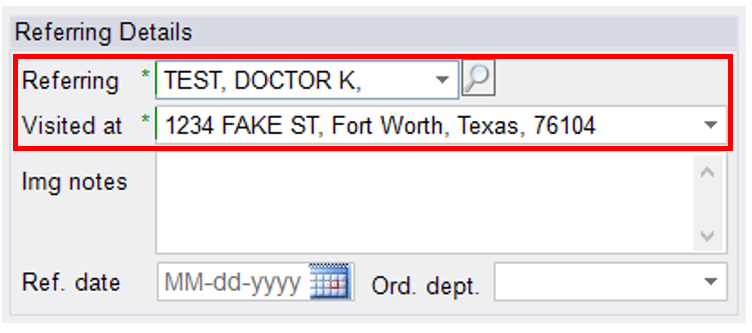
- Referring Details - add referring provider name (who will receive the report), and location
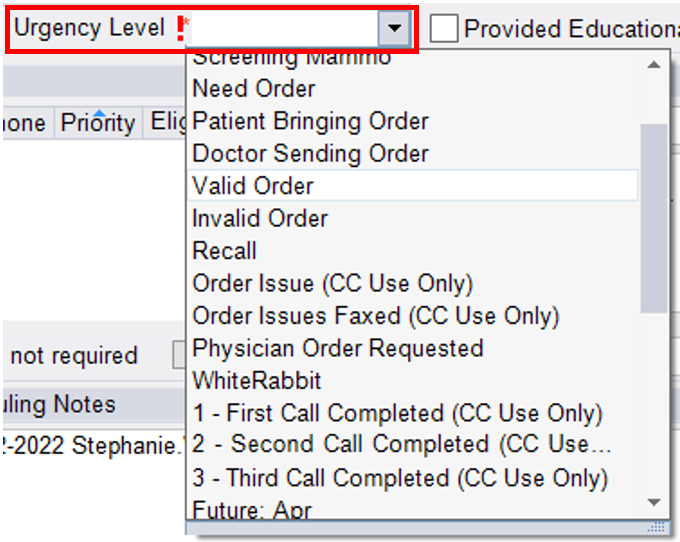
- Urgency Level (status of the written order) - select from dropdown
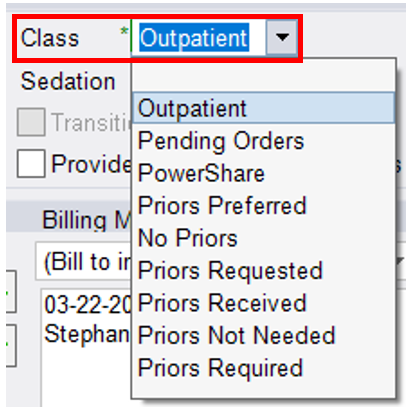
- Class (prior imaging status) - select from dropdown
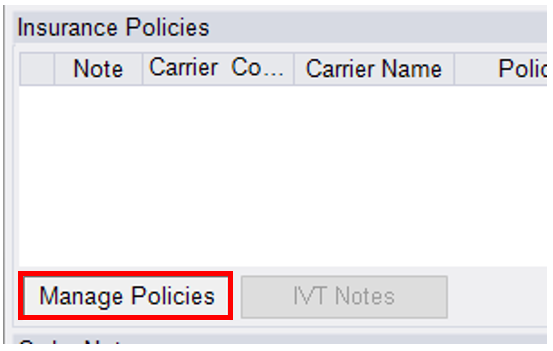
- Manage Policies (insurance coverage)
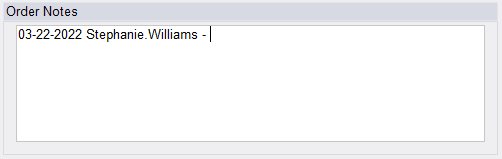
- Order Notes - add documentation, including Reason for Order and any other relevant information
- Reason for Order - select from dropdown or free type into field if reason provided is not on list. Copy and paste the Reason for Order into the Order Notes field
- Once all fields on the Order tab have been completed, click on the Schedule tab

- Complete the following fields
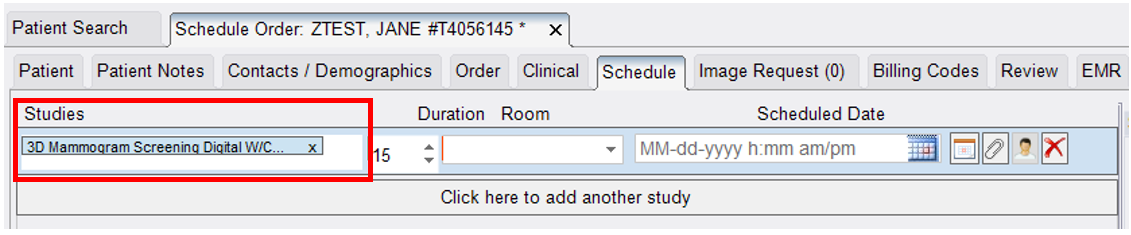
- Studies - type in the exam that the patient is being scheduled for
 NOTE: If needing to schedule more than one exam, click "Click here to add another study"
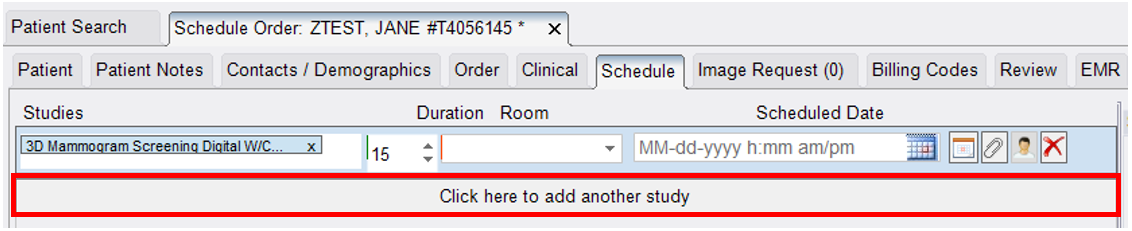
- Laterality - only required when scheduling a mammogram

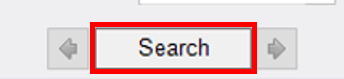
- Use the Search Options to search a specific location, dates and/or times
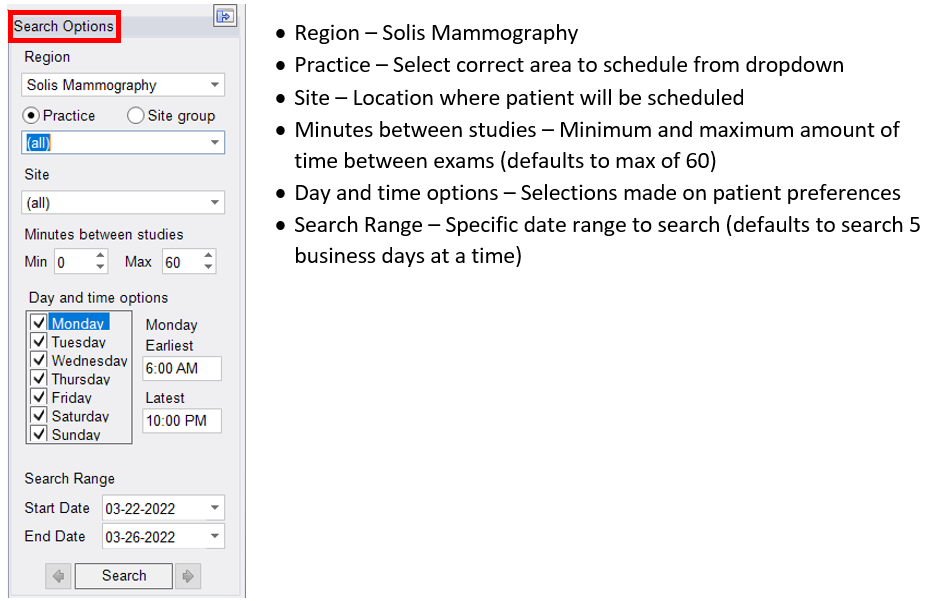
- Once completed, click Search
- Studies - type in the exam that the patient is being scheduled for
- Available appointment times will display on the lower, left-hand portion of the Schedule tab
NOTE: Click on the Details tab to view additional times for the dates selected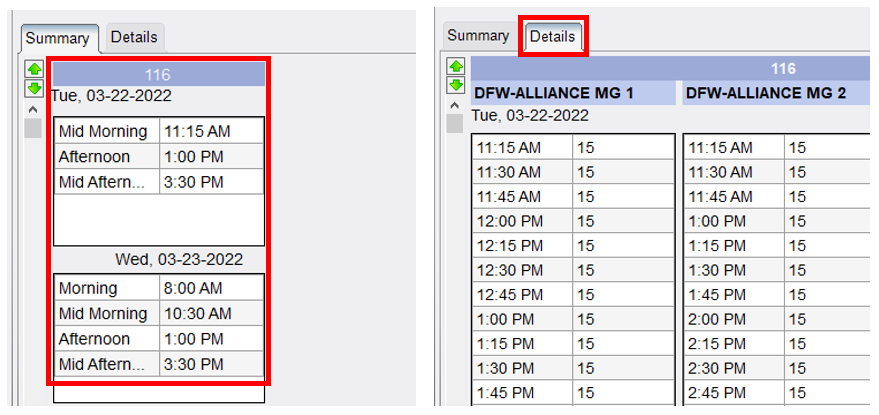
- DO NOT SCHEDULE IN YELLOW SLOTS! THESE ARE BLOCKED AND NOT TO BE USED!
- Select a time by clicking once, selection will highlight blue
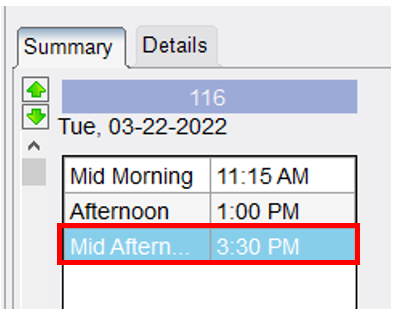
- The Scheduled Date will display the selected date and time at the top (near Studies)

- Once all required fields have been completed on the Order tab and Schedule Tab, click Schedule on the lower, right-hand corner
 NOTE: Do not click Save as Order - no appointment will be scheduled. Clicking close will back out of the scheduling process and all patient information entered will be lost.
 - The Schedule Summary (confirmation) will display - EXAM IS NOT SCHEDULED YET!
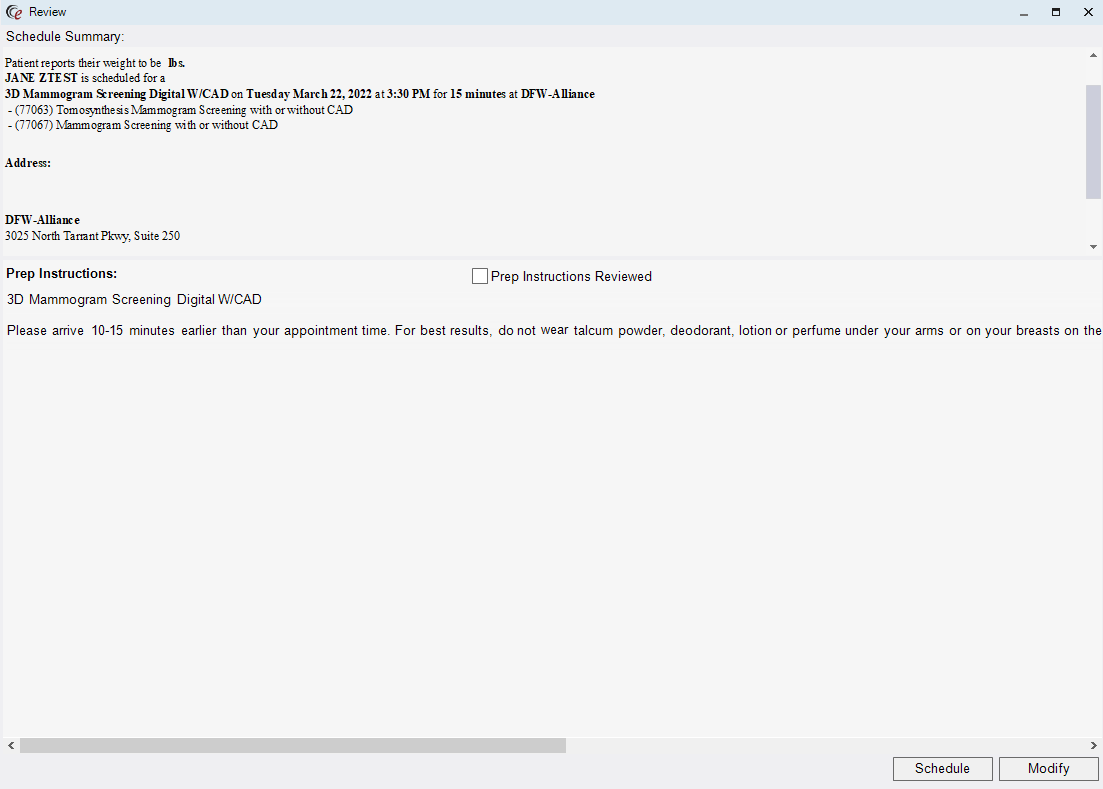
- Confirm the following information
- Exam type(s)
- Scheduled Date
- Scheduled Time(s)
- Offer the Center address
- Provide Prep Instructions and check the "Prep Instructions Reviewed" box
- Once confirmation is provided, click Schedule
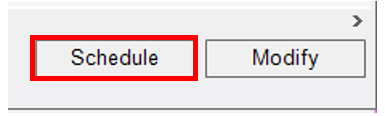 NOTE: Clicking Modify will close the Schedule Summary window and take you back to the last tab you were on for scheduling. This option allows you to make any necessary updates to the exam type, date or time selected.
- Confirm the following information
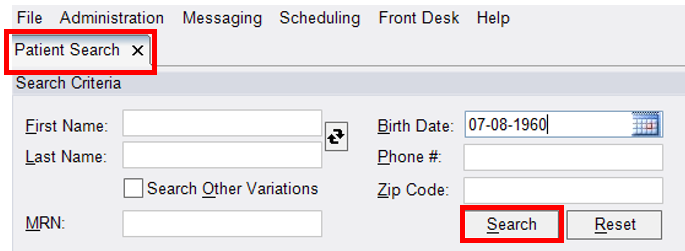
- Once the exam is scheduled, you will be returned to the Patient search window
- Click Search (original search criteria should still be populated in the respective fields)
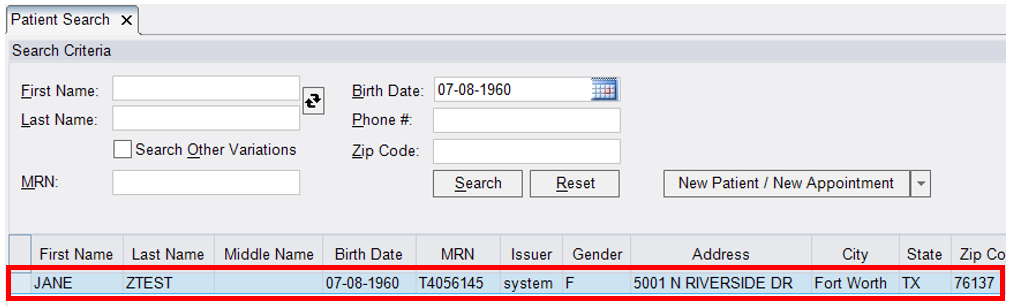
- The new patient profile will now display in the search results
- Click Search (original search criteria should still be populated in the respective fields)


EDITED: 05/23/2023
