
Merge - Schedule Exam
The purpose of this document is to provide instructions for scheduling a single exam through the Merge RIS system.
- Search for and select patient in Merge
- Start on the Schedule Tab:

- Complete the following fields:
- Physician

- Location

- Insurances - Hover over listed insurance to view policy and group numbers
NOTE: Can also Add, Edit and Inactivate insurance
- Appointment Reason - DO NOT LIST TYPE OF EXAM HERE, MUST BE REASON FOR THE EXAM

- Exam Code/Description
 NOTE: Double-click on the exam type to add it to the Selected Exams section

- Once all fields have been completed, click FIND

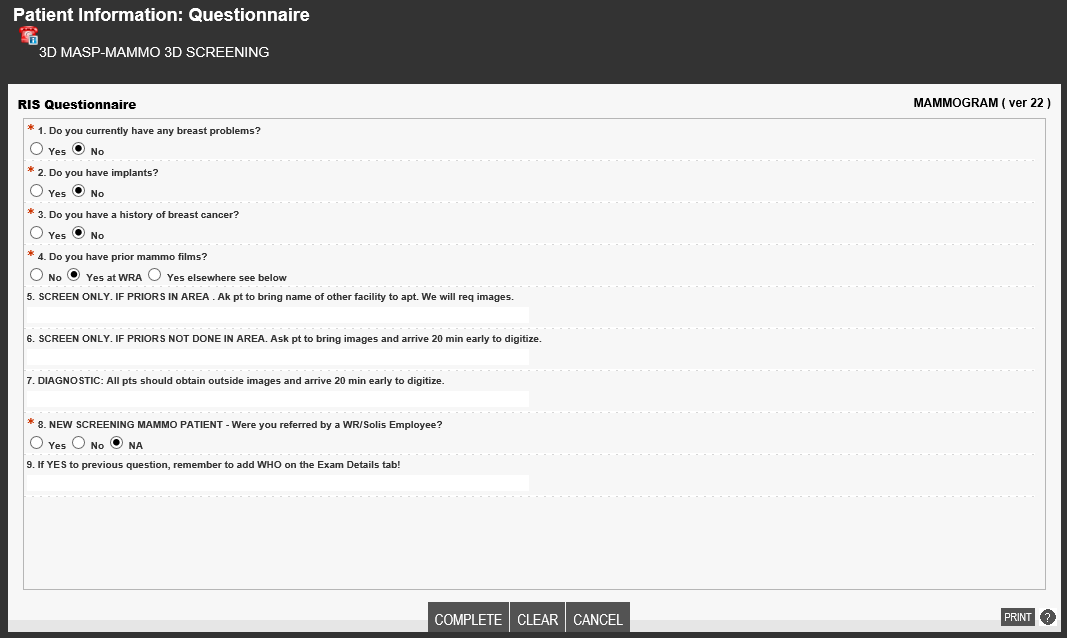
- Patient Information: Questionnaire will display - Ask patient the questions and make selection accordingly, then click COMPLETE
- The Schedule: Appointment Book window will populate
- Use the arrows on either side of the date to move forward or backward by one day

- Use the calendar icon to jump to a specific date - NOTE: Single arrow on either side of "Today" will move calendar back or forward by one month, double arrow will move calendar back or forward by one year

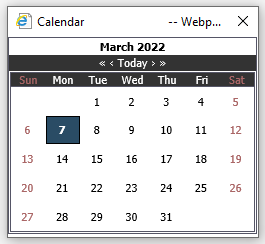
- Use the arrows on either side of the date to move forward or backward by one day
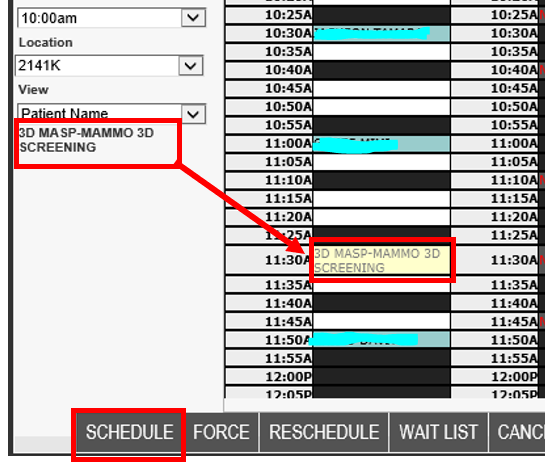
- Drag and drop the exam to the requested date and time slot, then click SCHEDULE
- The Schedule: Confirmation window will populate
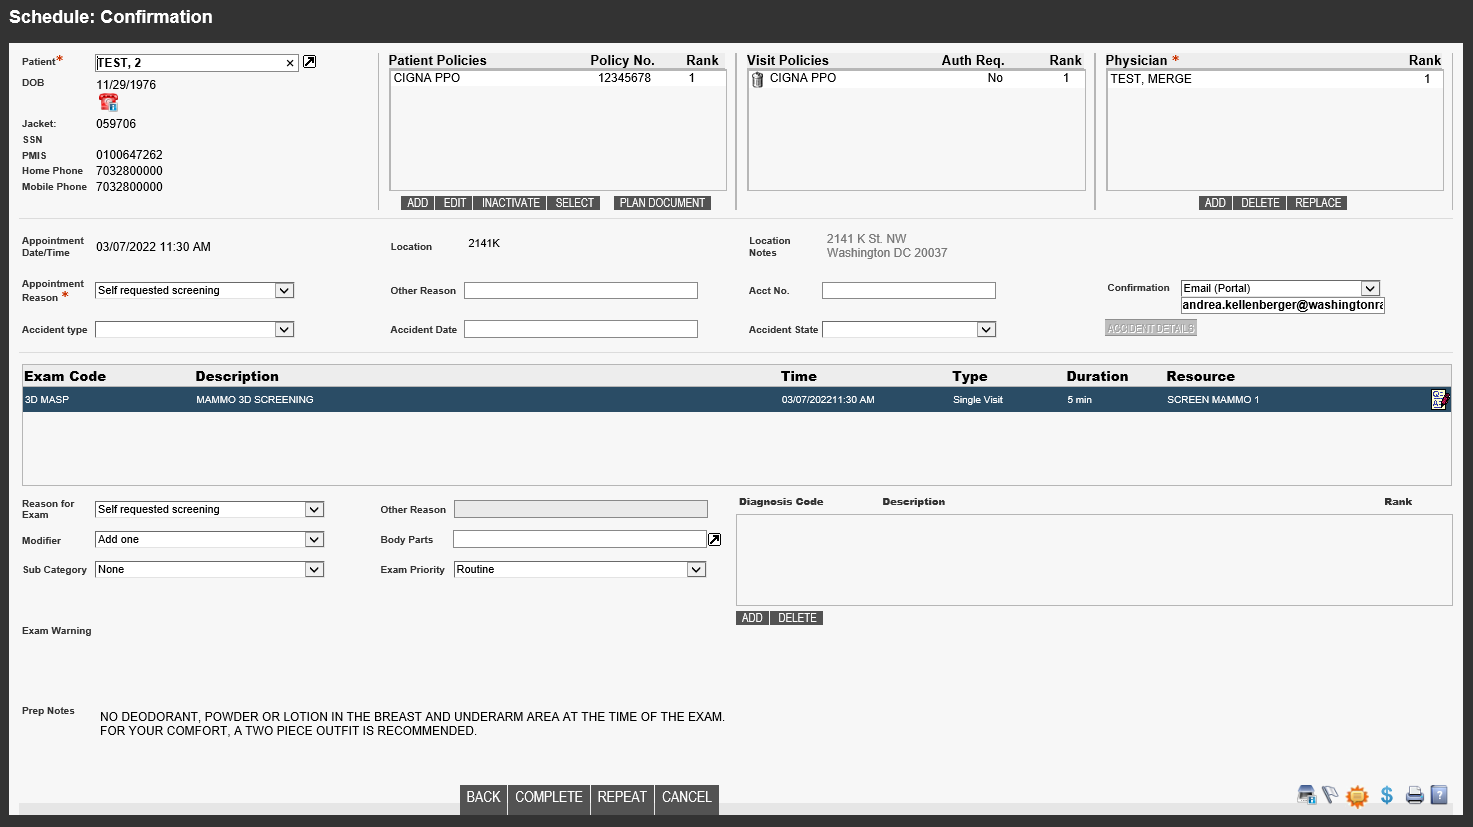
- Provide appointment confirmation
- Date, time and location of appointment(s) - Offer Center address
- Provide all prep instructions
- Advise patient to bring their photo ID, insurance card(s) and their written order
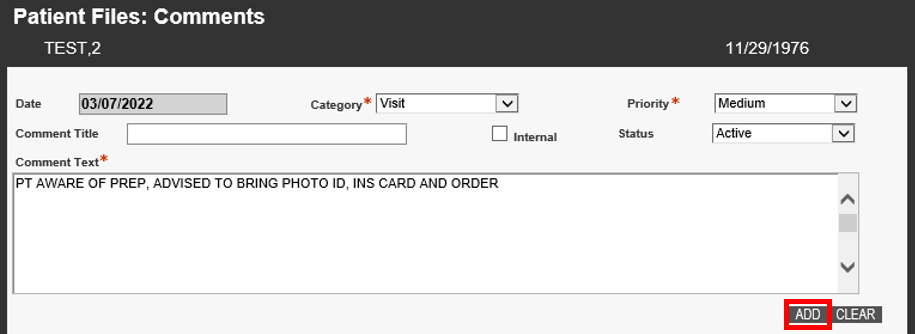
- Add Notes/Comments by clicking on the Comments icon located in the lower left-hand corner of the screen

- The Patient Files: Comments window will populate - Add notes to the Comment Text field and click ADD
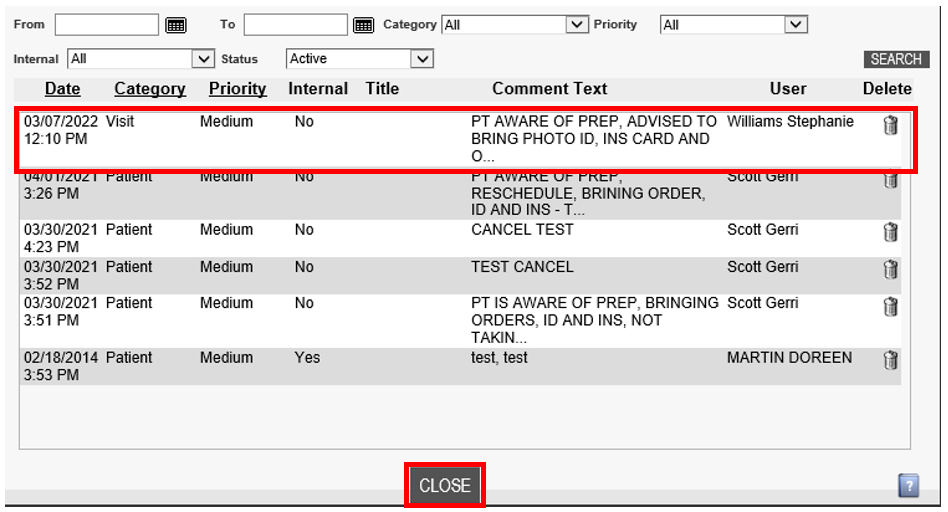
 Confirm notes were added to the bottom portion of the screen and click CLOSE
- If necessary Add/Remove patient flags by clicking on the Patient Flag icon

- Click COMPLETE to finish scheduling

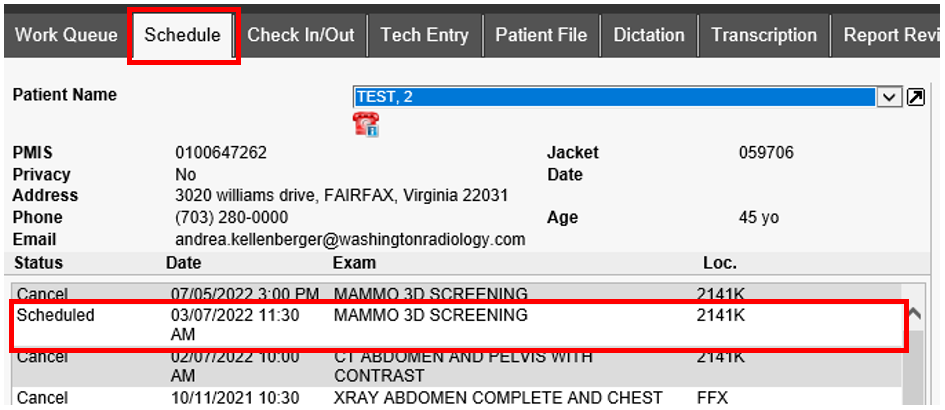
- The Schedule Tab will display again, with the scheduled appointment showing
EDITED: 03/07/2022


 NOTE: Double-click on the exam type to add it to the Selected Exams section


 Confirm notes were added to the bottom portion of the screen and click CLOSE


