
Scheduling From an Ordered Accession
Step 1: Open the Patient Folder
- Use the search function in eRAD to locate and open the correct Patient Folder.
Step 2: Review the Physician Order
- Highlight the ordered exam in the Patient Folder.

- Right-click the exam and select "Attachments".
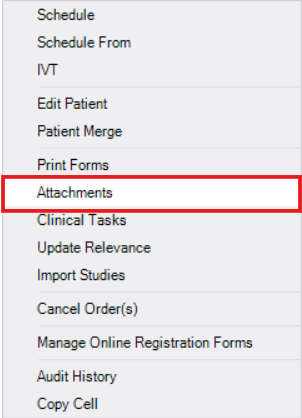
- In the Attachments tab, check the box to "Show all documents for patient" (top right)
- Double-click on the correlating Physician Order to open it.

- Verify that the order includes:
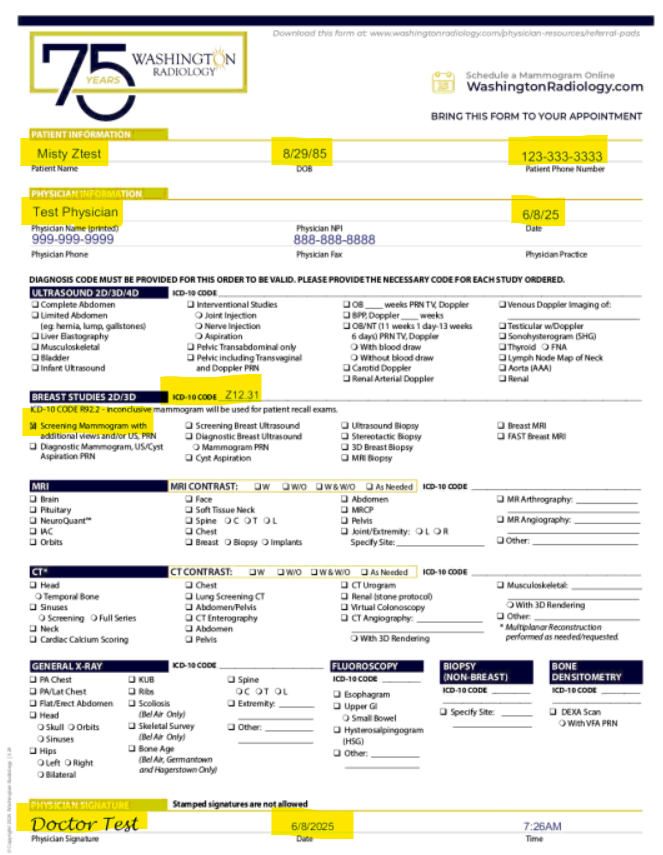
- Correct patient
- Valid date
- Exam name
- Reason for order
- Referring provider's signature
- Click [Close] to exit the Attachments tab.


Step 3: Begin Scheduling
- Right-click the ordered exam and select "Schedule"

- The Schedule Order tab will populate


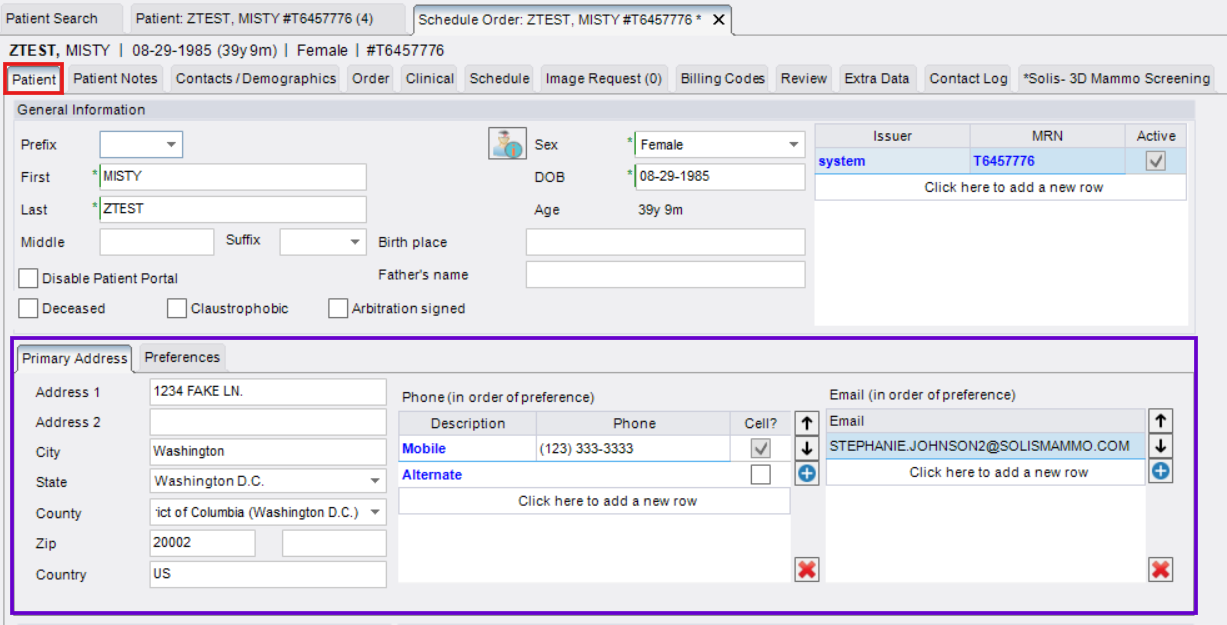
Step 4: Verify Patient Contact Information
- From the Patient Tab, review, update, or add contact information (address, phone, email).
 NOTE: Add Preferred Language if anything other than English

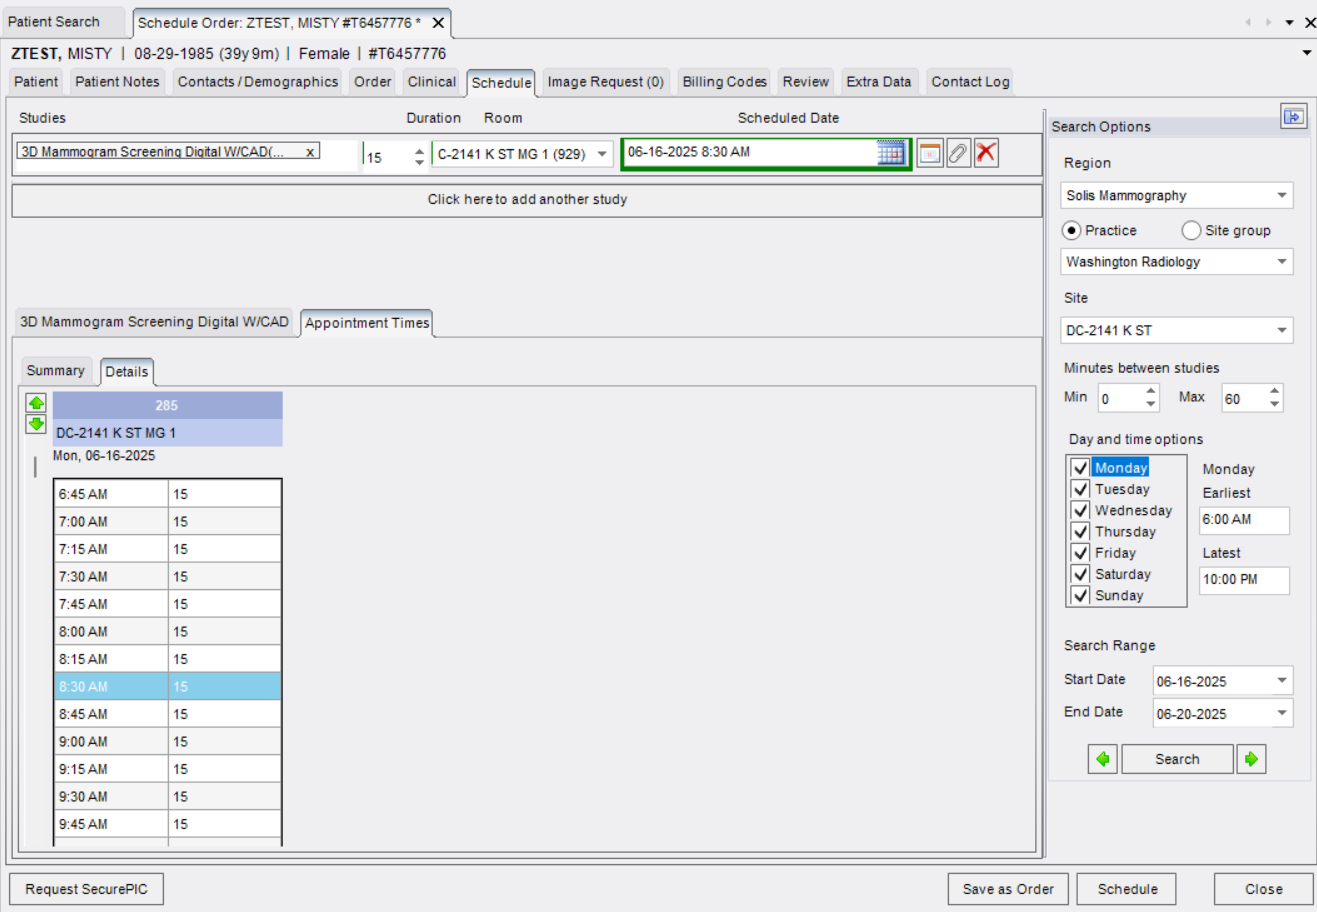
Step 5: Complete the Schedule Tab
- Study (Exam Type) will already be entered

- This information may need to be updated depending on whether the correct exam is order based on the reason, or if the patient has new/changed symptoms and the order is for a routine screening mammogram.
- Set Search Criteria

- Site may already be selected during order loading process, please confirm where patient would like to schedule.
- Site may already be selected during order loading process, please confirm where patient would like to schedule.
- Click [Search]
- Available appointment times will display on the lower-left of the the window
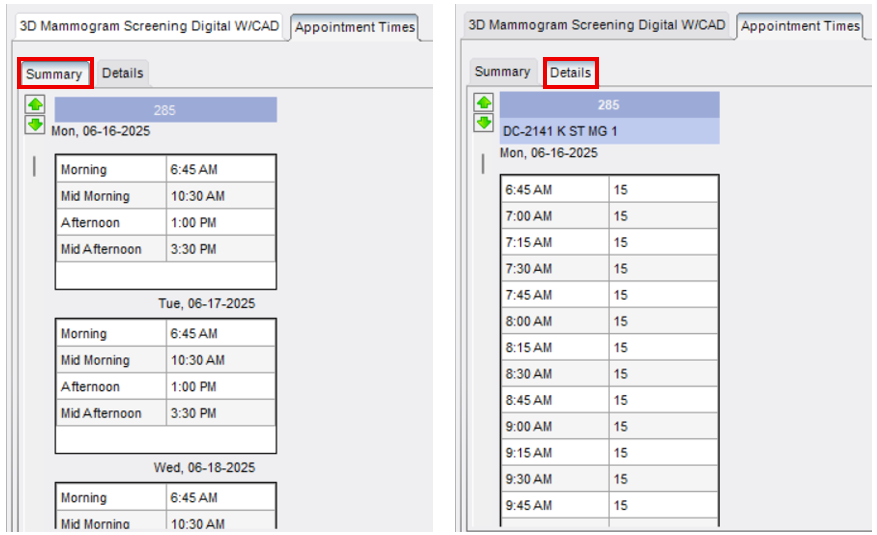
- Summary Tab: Shows first AM, mid-AM, PM, mid-PM, etc.
- Details Tab: Shows ALL available appointment slots
- Available appointment times will display on the lower-left of the the window
- Select the desired time (click once, it will highlight blue)
- This information may need to be updated depending on whether the correct exam is order based on the reason, or if the patient has new/changed symptoms and the order is for a routine screening mammogram.


Step 6: Complete Exam Questionnaires (If Applicable)
If a questionnaire is associated with the exam(s) selected, an additional tab will appear for each exam that has an associated questionnaire once a time is selected:
- Ask the patient the required questions
- Accurately enter their responses into eRAD
- You must complete the questionnaire before proceeding.
- You cannot save or finalize without entering questionnaire responses when required.
Step 7: Complete the Order Tab
Fill in all required information:
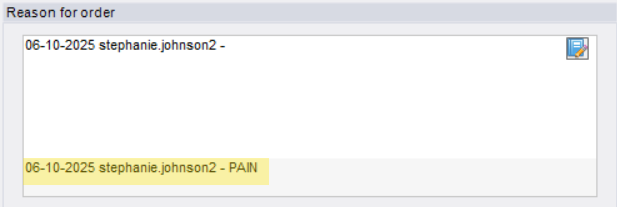
- Reason for Order will already be listed. Only add this if it is missing or incorrect.
- Referring Details will already be listed. Only add this if it is missing. DO NOT change if order is attached as this must reflect the name of the provider who wrote the order.
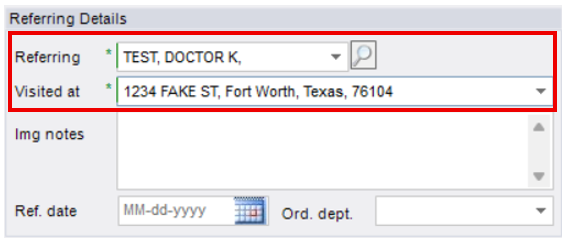
- Confirm a portion of the providers address to assure confidential reports are sent to the intended office
- Confirm a portion of the providers address to assure confidential reports are sent to the intended office
- Urgency Level (Order Status) will typically be "Order Attached" if an order is available in eRAD
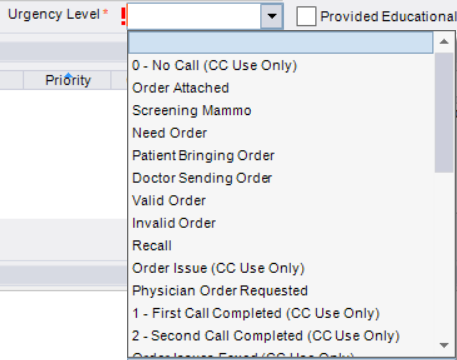
- Choose based on whether an order is provided or pending (e.g., Order Attached, Need Order, etc.)
- Choose based on whether an order is provided or pending (e.g., Order Attached, Need Order, etc.)
- Class (Prior Imaging Status) must be updated to reflect status of prior related imaging. Do not leave as "Pending Orders" or "Outpatient"
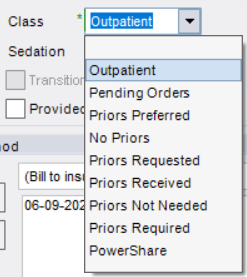
- Select the appropriate Class based on whether outside related imaging is necessary for comparison purposes
- Select the appropriate Class based on whether outside related imaging is necessary for comparison purposes
- Manage Policies/Billing Method must be updated.

- Click [Manage Policies] to add payor information (insurance, non-profit, etc.), OR
- Change dropdown under "Billing Method" to convert patient to self-pay if insurance is not available.
- If insurance information is not available at the time of scheduling, send SecurePic link.
- Order Notes
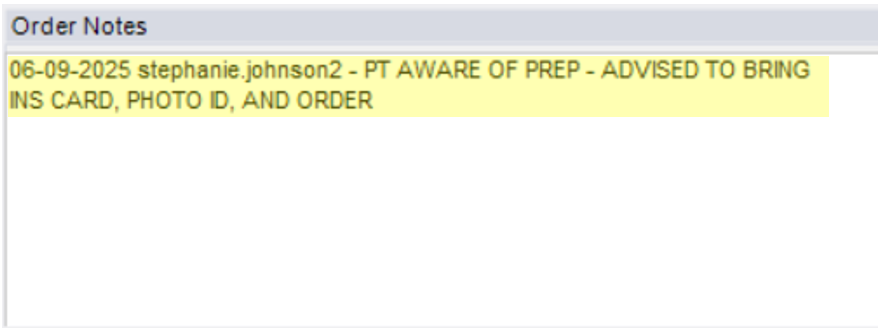
- Add notes related to the exam
- "PT AWARE OF PREP - ADVISED TO BRING INS CARD, PHOTO ID, AND ORDER TO EXAM"
- Add notes related to the exam


Step 8: Finalize & Confirm Appointment
- Click [Schedule] in the bottom right

- Do not click [Save as Order] or [Close] - doing so will not save the appointment

Step 9: Schedule Summary (Confirmation Screen)
Before finalizing, confirm:
- Exam type(s)
- Scheduled date and time
- Center name
- Offer address
- Prep Instructions
- Check the "Prep Instructions Reviewed" box
- Click [Schedule] to complete

- Click [Modify] if you need to make changes to date, time, exam type, etc.

EDITED: 06/10/2025
