
Adding a Referring Provider to an Exam in eRAD
Purpose: This job aid provides step-by-step instructions for Contact Center agents to add or update referring physician information in a patient's exam within eRAD.
Step 1: Open the Patient Folder
- Use the search function in eRAD to locate and open the correct Patient Folder.
Step 2: Open the Exam / Access the Order Tab
- From the Patient Folder
- From a Scheduled Exam:
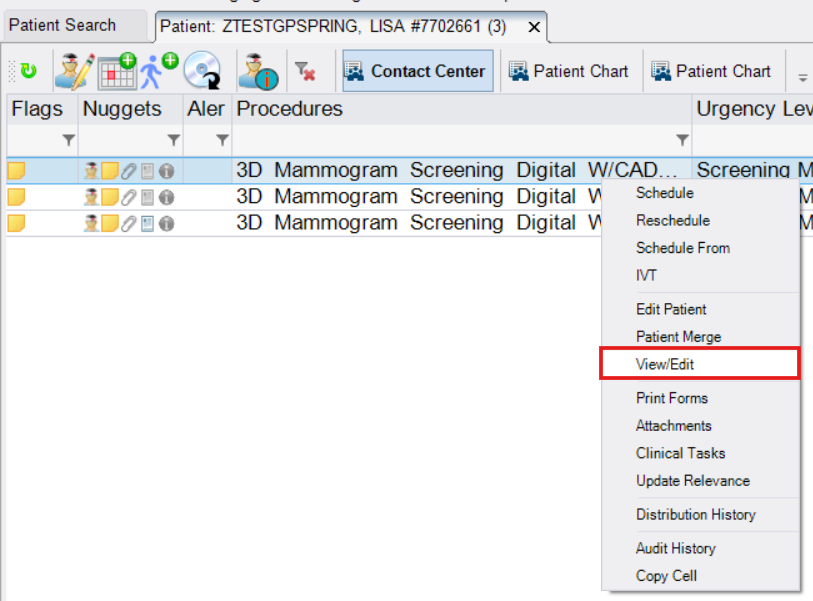
- Select the accession that needs to be updated
- Right-click and select View/Edit
- The View/Edit tab will open
- Navigate to the Order tab

- Navigate to the Order tab
- Continue to Step 3 below
- While Scheduling (New Appointment or Ordered Accession)
- Double-click on the ordered accession ORclick the New Appointment button from the toolbar

- Complete required workflows for the Patient tab, Schedule tab, Exam Questionnaire (if applicable), and Order tab

- Continue to Step 3 below
- Double-click on the ordered accession ORclick the New Appointment button from the toolbar
- From a Scheduled Exam:


Step 3: Add or Update the Referring Physician
- To Select a Past Referring Physician (if available)
- Use the dropdown in the Referring field to select from the patient's previously used providers.
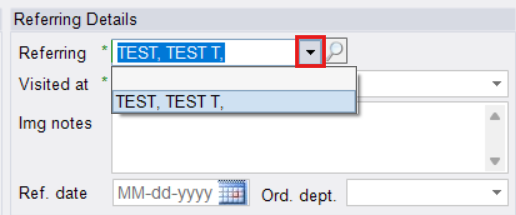
- Use the dropdown in the Referring field to select from the patient's previously used providers.
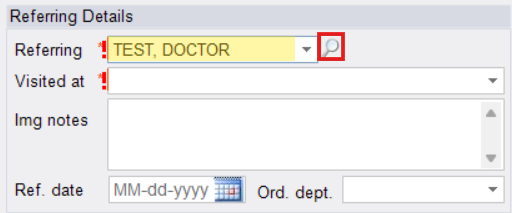
- To Add a New Referring Physician
- Start typing the providers name in the Referring field.
- Press Enter or click on the magnifying glass to search.
- Review the list of results
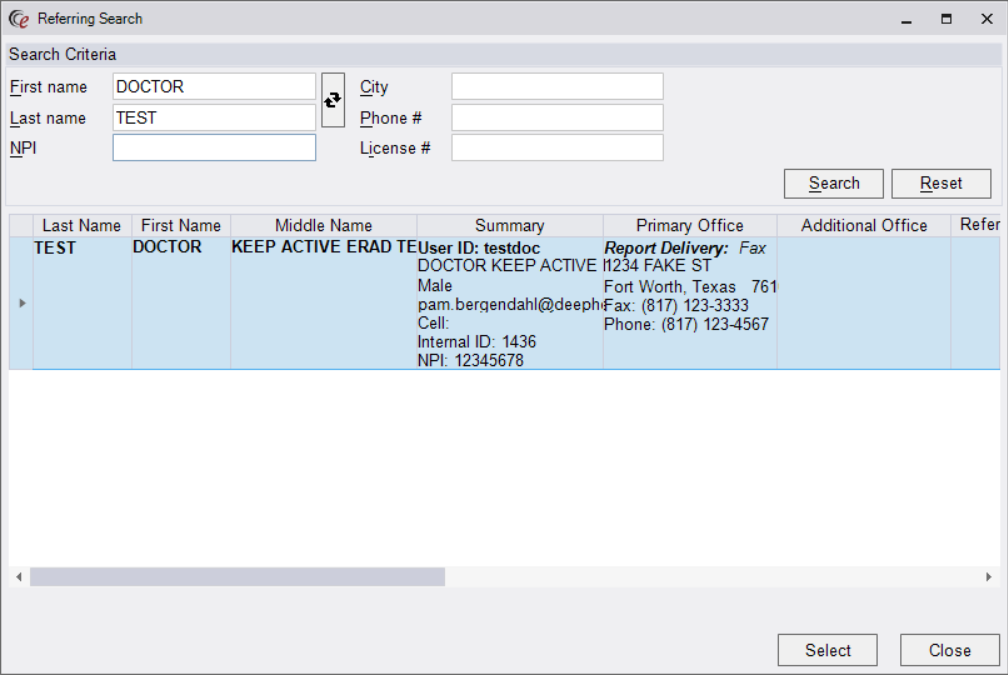
- Once the correct provider has been located, double-click to select.
- If the referring provider is not in the results, try using other search criteria (e.g., phone number, NPI, etc.)
- If you are still unable to locate the provider, use "UPDATEREQUIRED PHYSICIAN" as the placeholder and leave detailed notes regarding the situation under Order Notes.


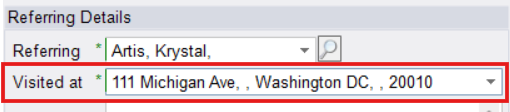
Step 4: Assign the Visited At Location
- If the provider only has one location, the address will populate automatically in the "Visited At" field
- If the physician has multiple locations, a red exclamation mark will appear:
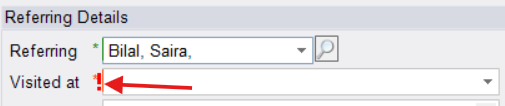
- Select the correct location from the dropdown by confirming with the patient or caller.
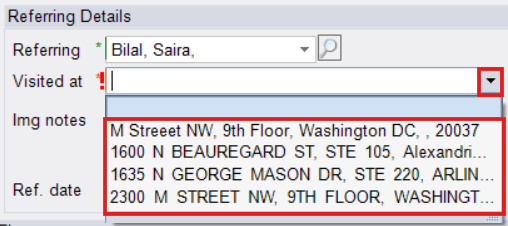
- Select the correct location from the dropdown by confirming with the patient or caller.


Step 5: Add Additional (CC) Providers

- Search for additional CC providers the same way you added the primary referring provider.
- Select the provider and choose the correct Visited at location.
- Repeat as needed to add all CC providers.
- Do NOT check the "Copy to patient" box
Step 6: Save Changes
- From a Scheduled Exam:

- Click [Save] from the bottom right corner
- Click [Save] from the bottom right corner
- While Scheduling (New Appointment or Ordered Accession)

- Changes will be saved when the exam is scheduled by clicking the [Schedule] button on the Schedule Summary (confirmation) window.


EDITED: 06/10/2025
