
Cancelling an Exam in eRAD
Purpose: Use this workflow when a patient request to cancel a scheduled exam.
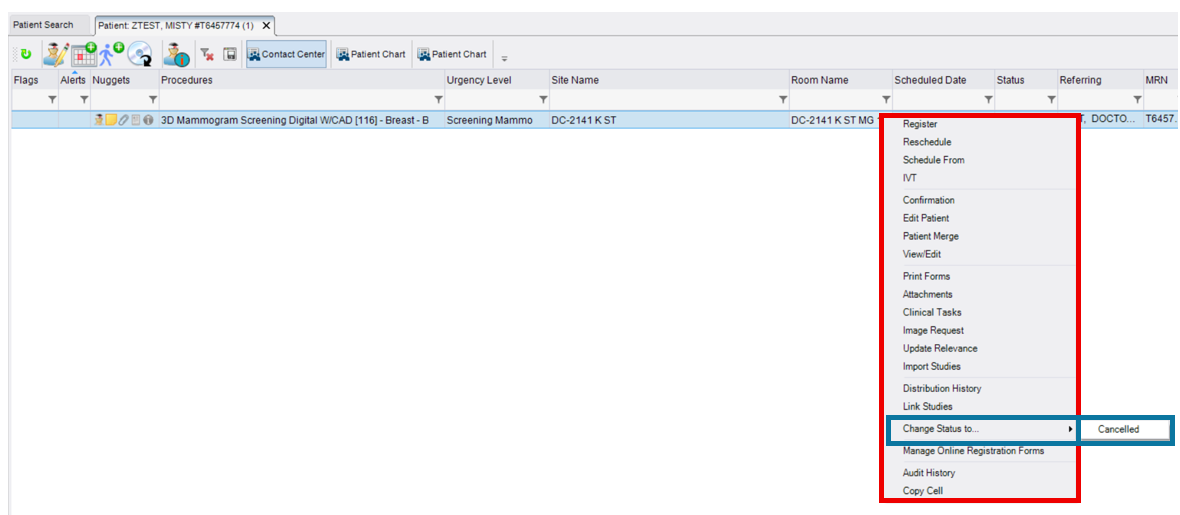
Step 1: Locate the Exam
- Use the search function in eRAD to locate and open the correct Patient Folder.
Step 2: Cancel the Exam
- Right-click the highlighted exam
- Hover over "Change Status to..." and select "Cancelled"
- The Cancel Study window will populate
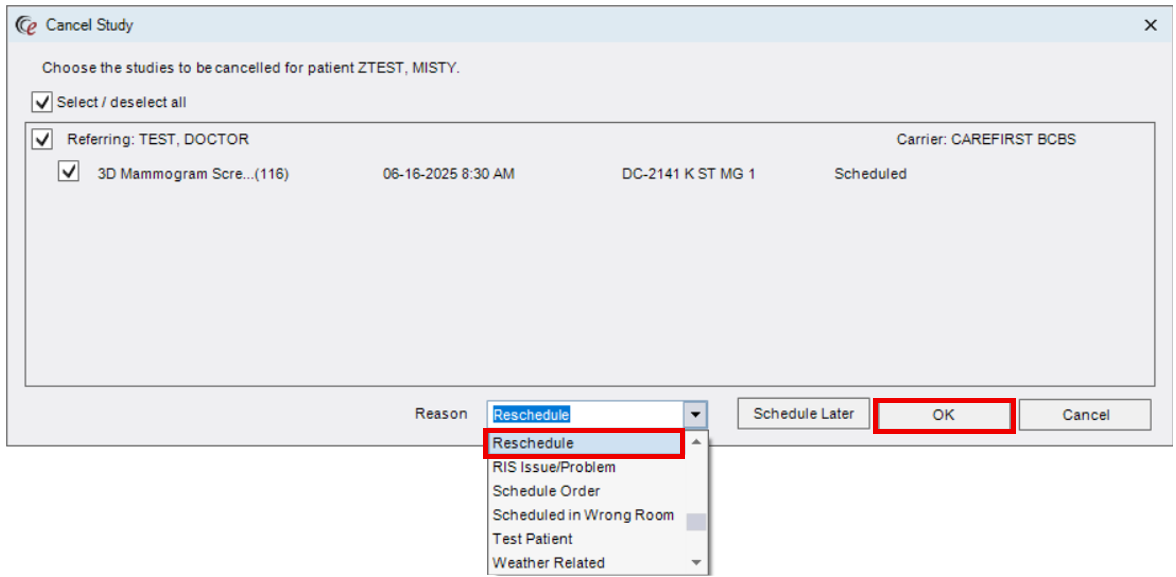
- If multiple exams are scheduled on the same day, a list will populate.
- Check the box next to any additional exams the patient wants to cancel.
- Select "Reschedule" as the Reason from the dropdown.
- Click [OK] to finalize the cancellation.
- Do NOT select "Schedule Later"
- The exam status will now appear as "Cancelled"


Step 3: Add Cancellation Notes
- Right-click the now cancelled exam and select "View/Edit"
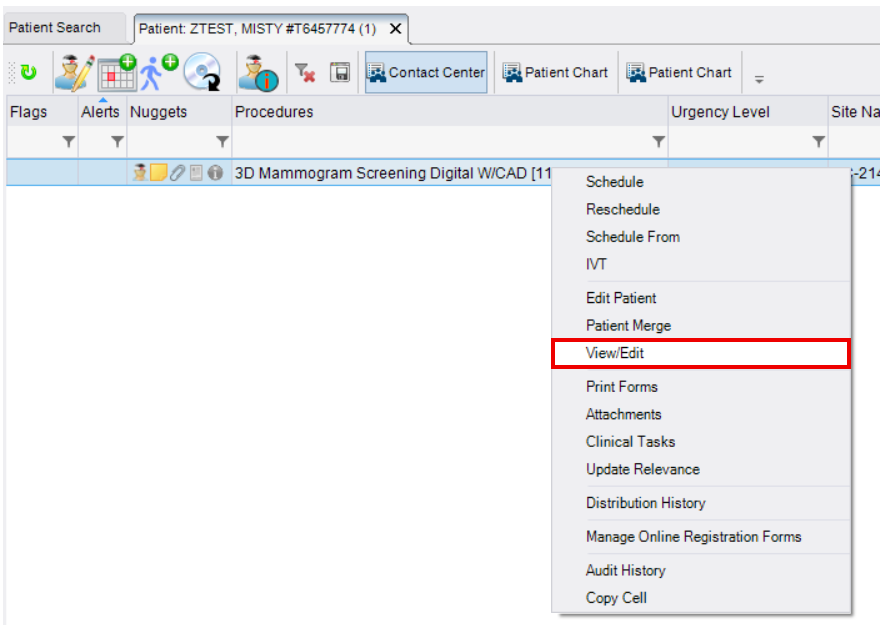
- The View/Edit tab will open, navigate to the Order tab.
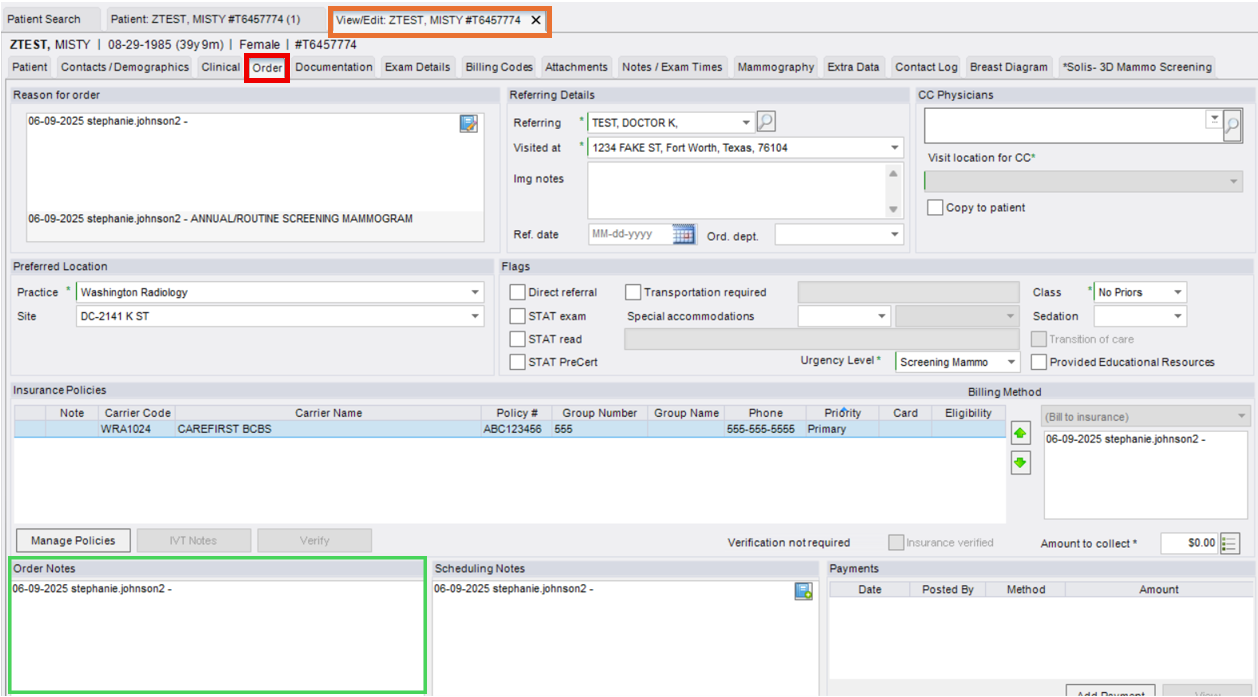
- Add notes in the Order Notes field
- Use ALL CAPS for visibility and consistency
- NOTE:
- Order Notes = Specific to the exam (e.g., cancellation reason, who requested it).
- Patient Notes = General patient information not tied to a specific exam.
- Click [Save] in the lower right-hand corner to complete.


EDITED: 06/09/2025
